React.js Best Practices & Patterns - Part 3
Component Design Patterns for high-quality applications

Component Design Patterns
When developing React apps, it’s critical to create components that are simple to use, reusable, and don’t give you a headache when trying to change them. This is where design patterns come into play. This section will look at some design patterns that might help you create reusable and flexible components. These patterns will assist you in breaking down large components into smaller, more manageable portions that are easier to understand, test, and maintain.
📝Feel free to explore the second segment of this series of articles— go ahead and give it a read!
React.js Best Practices & Patterns -Part 2
Separation of concerns for high-quality applications

1. Higher-Order Components (HOCs)
Higher-order components (HOCs) are fascinating! They are functions that take one component and return another with additional features or behaviors. They essentially allow you to reuse component code and handle things like authentication and data retrieval.
For example, you may use a HOC to determine whether a user is authenticated and then wrap it around a component that requires authentication. The wrapped component will appear if the user is authenticated. If they do not, they will be directed to the login page. Here’s an example to show you what it looks like:
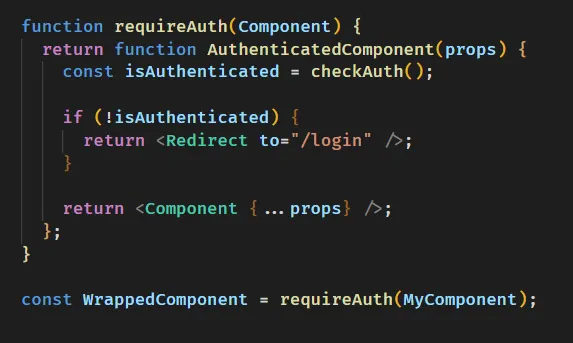
So, in this example, we have a function called requireAuth that takes a component as input and returns a new one that checks to see if the user is logged in. If not, the user is directed to the login page. Otherwise, the wrapped component is rendered with the HOC’s extra props.
We may now use HOCs to wrap a component that requires data retrieval. Essentially, the HOC will retrieve the data and provide it to the component as props.
like below:
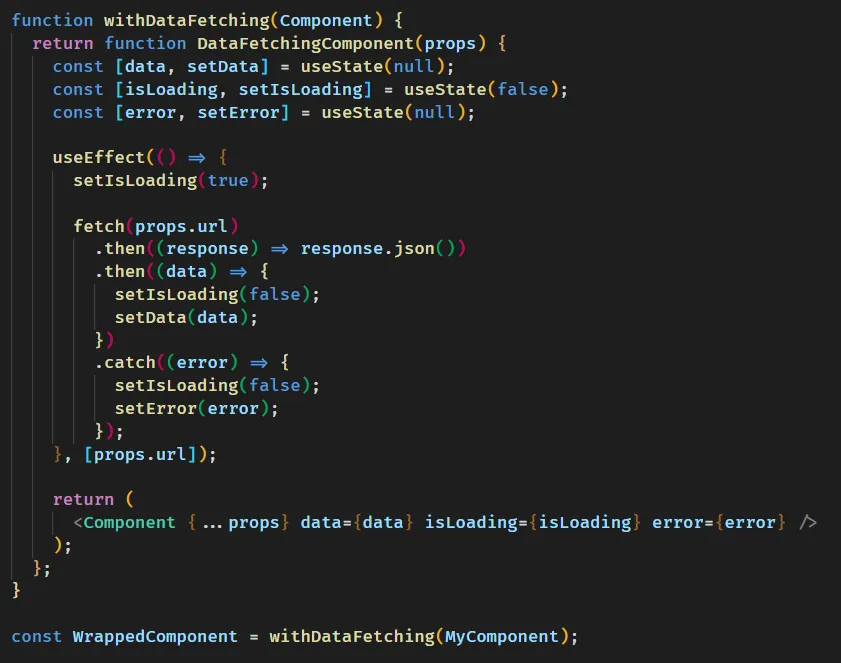
So in this example, the withDataFetching function takes a component and gets data from a URL to pass it down as props. If there’s an error, it goes into the error prop, and if the data’s still loading, the isLoading prop is set to true.
There are plenty of additional cool HOCs that may be used with React! Connect from the react-redux library, for example, connects a component to the Redux store, allowing it to access the store’s state and dispatch methods. This means you can quickly construct components that respond to Redux store changes. Another is withFirebase from the react-redux-firebase package, which gives a component a Firebase instance so it may interact with the Firebase backend.
HOCs are cool because they allow you to reuse component functionality and deal with issues that affect the entire project. It’s the equivalent of slaying two birds with one stone! HOCs keep your components neat and tidy, making them easy to care for, focused, and easy to manage.
2. Render Props
Render props are a way in React that allows you to share code between components by giving a function as a prop to a child component, and in some circumstances, it can be more flexible than HOCs.
When called, this function returns a React element (JSX). The goal behind render props is to delegate the rendering of specific parts of the component to the parent component. As a result, the child component can concentrate on providing the required functionality, while the parent component decides how the content should look.
Let’s see an example of how Render Props work in real life:
We want to create an online store app and we need to display a list of products in various places of the app. We wish to retrieve the products and show them in various ways, such as a grid or list view. Here’s how we can do it with the Render Props pattern:
- Create a ProductFetcher component: that retrieves the product data and accepts a Render Props (a function):
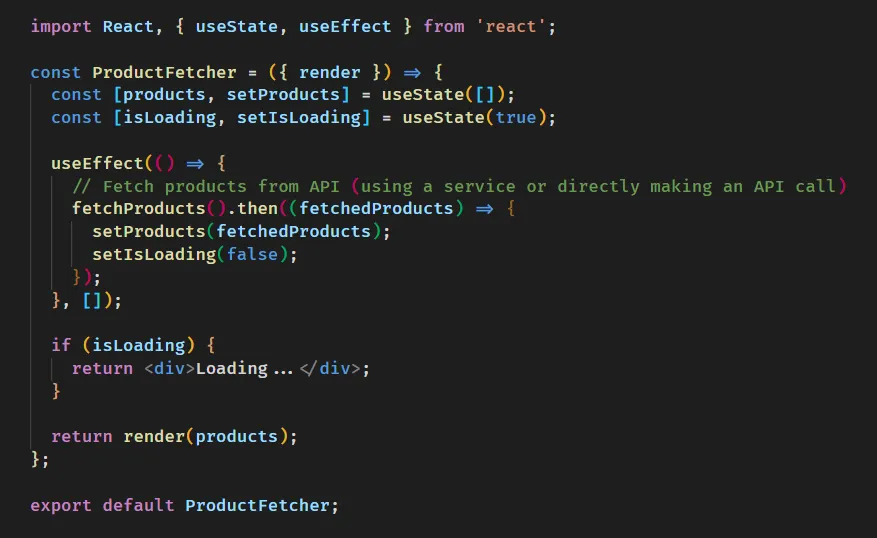 The ProductFetcher component is in charge of fetching the products and handling the loading state in this example. It takes a Render Props, a function, as an argument and calls it with the products.
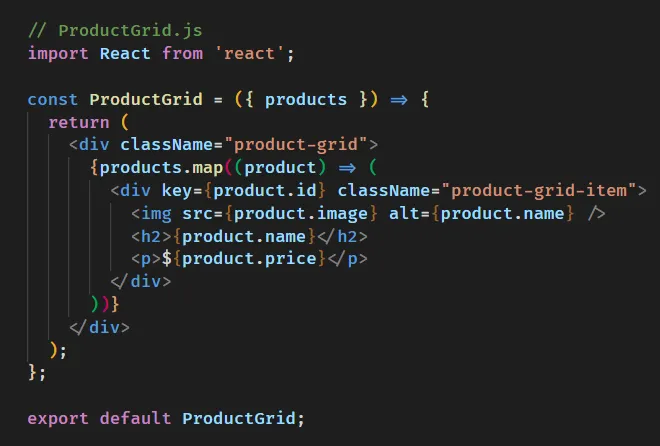
2. Build two distinct components for presenting the products in a grid and list views:
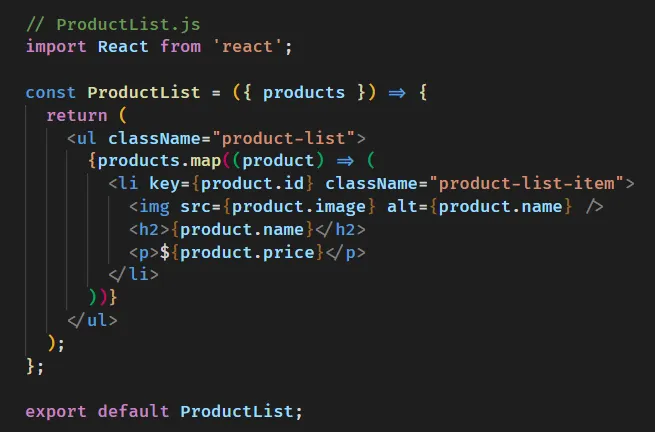
3. Finally, use the ProductFetcher component and pass the appropriate render function to display the products in different formats:
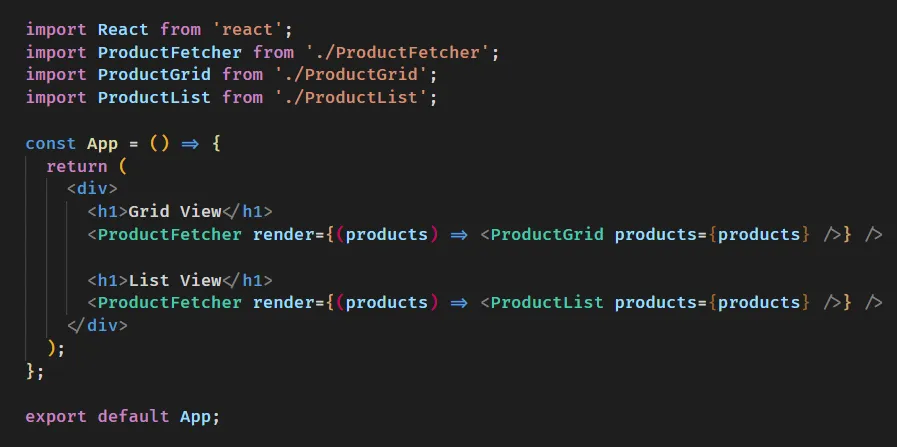 In this example, the ProductFetcher component retrieves and handles product data. The ProductGrid and ProductList components are responsible for showing products in various formats. The ProductFetcher component retrieves product data using the render prop, and the parent component (in this example, App) specifies how the products should be displayed.
Benefits from using the Render Props approach:
- Separation of concerns: The ProductFetcher component is only in charge of fetching and managing product loading states. It is not concerned with how the products are displayed.
- Reusability: The ProductFetcher component may be used across the app to fetch and display data in various formats easily.
- Flexibility: The parent component can decide how the products are displayed, allowing us to alter the UI without affecting the fetching mechanism.
3. Compound Components
Compound components are a cool design technique that allows you to develop better and more versatile components. You can group relevant components together and manage their behavior from a parent component, making your code more organized and user-friendly.
An accordion component, which typically includes many panels that expand and fold when you click them, is a popular example of this. You may utilize compound components to create a reusable accordion component that is both easy to customize and simple to use.
Let’s check out an example of how to make an Accordion component using compound components:
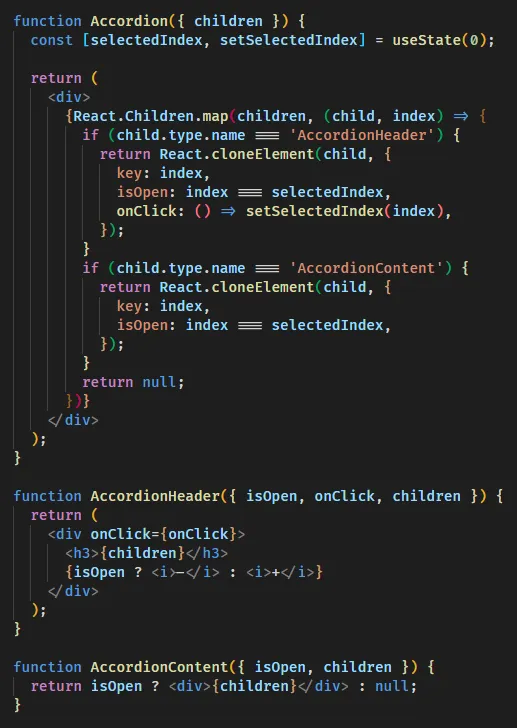 In this example, we got this Accordion component, where we render a list of children and loop through them with React.Children.map to determine when to display them. We use React.cloneElement to provide new props to the AccordionHeader and AccordionContent to customize how they operate.
Here’s how all of these components would appear in a MyAccordion component:
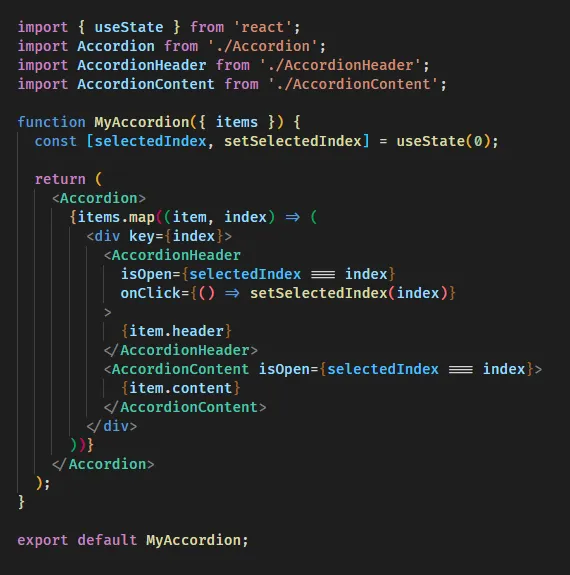 You must agree with me that this component is way more comprehensive, easy to reason about, and clean.
Compound components are incredibly amazing since they allow your components to be flexible and expressive. Rather than having a bunch of distinct components, you can put them all together under a parent component to make things much more intuitive and user-friendly. In a web project, things like accordions, tabs, and dropdowns can become very confusing, but with compound components, you can simplify everything and make it simple for your customers to navigate.
4. Optimize Rendering with React.memo
React.memo is like a hidden weapon for optimizing functional components. It ensures that the component only re-renders when the props change, which can result in huge performance gains, particularly when dealing with complex or expensive-to-compute props.
Essentially, it prevents wasteful renders and keeps your program functioning smoothly.
Consider the following example:
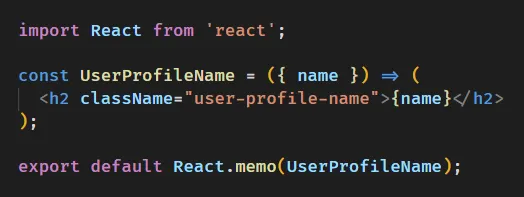
In this example, the UserProfileName component will only re-render when its name prop changes, avoiding unnecessary updates and improving performance.
5. Use React.lazy for Code Splitting and Lazy Loading
React.lazy is a cool utility that can help you speed up and optimize your project. It’s a built-in functionality that allows you to divide your components and load them only when needed. This is useful if you have a large project with many separate components that aren’t all required at the same time. React.lazy helps you choose which components to load and when to load them. This implies that your software will start up faster, consume less memory, and be more efficient overall.
Furthermore, it is quite simple to use — all you need to do is wrap your component in a custom function, and React will handle the rest.
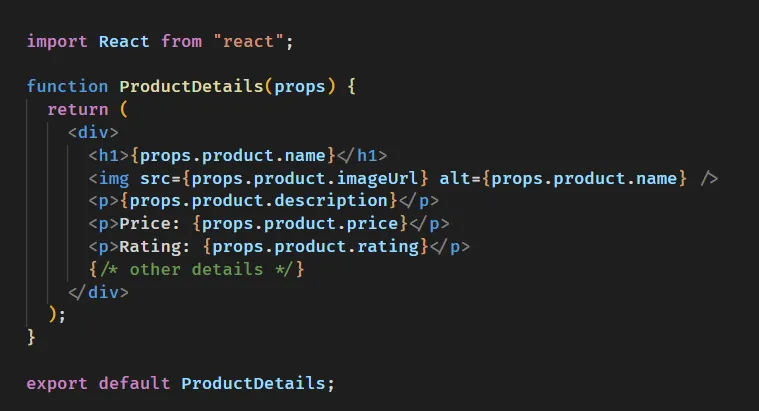
Assume you’re creating an e-commerce app with React. You have a product listing page where you can see all of the items in your inventory. Each item contains an image, a name, a price, and a description.
You also have a product details page where you can see additional information about a specific product, such as reviews, ratings, and similar items.
If you load all of the code for the product details page on the product listing page, the initial load time will be slowed and your app will feel slow.
to solve that use React.lazy to lazily load the ProductDetails page only when the user clicks on a product (see code below):
 wrap the ProductDetails component in a call to React.lazy:
 This tells React to lazily load the ProductDetails component only when it’s needed.
Finally, you use the ProductDetails component in your product listing page, and wrap it in a Suspense component to handle the loading state:
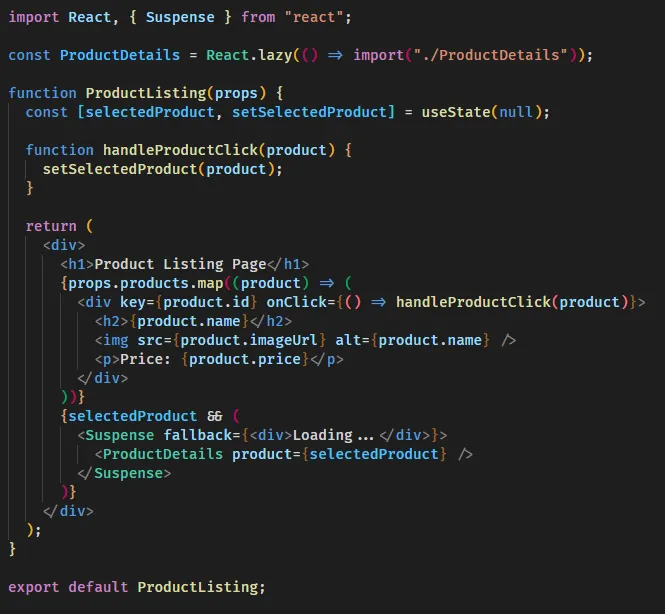 The Suspense component displays a loading state until the ProductDetails component is loaded.
That’s it! With React.lazy, you can lazily load components when you need them, making your app faster and more efficient.
6. Use Context and React.createContext for Global State Management
The Context API is an excellent approach to share state across several components without passing props down the component tree. This simplifies state management and makes your code more manageable.
let's see an example example:
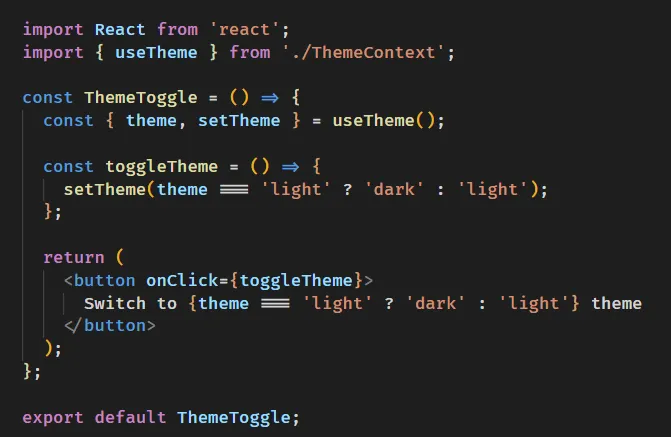
 So we’ve got a ThemeContext and a ThemeProvider component that we’ve wrapped around the app. It’s fantastic since any component can use the useTheme hook to retrieve and update the theme.
Here’s an illustration:
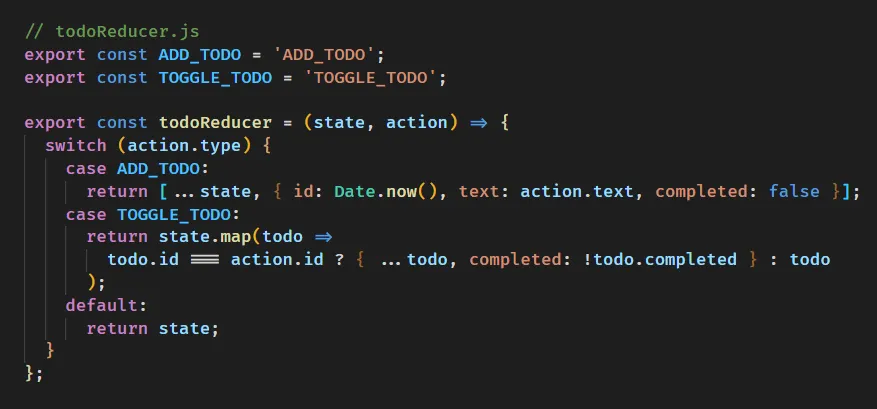
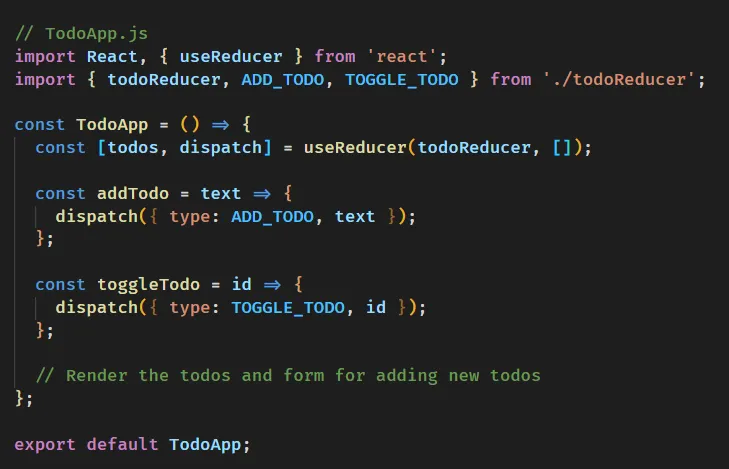
7. Reducers for Managing Complex State
Reducers in React are like an extremely useful tool for managing complex states in a predictable and testable manner. They are a functional programming paradigm that works well with the useReducer hook and frameworks such as Redux. Essentially, you provide the current state and an action to them, and they return the new state.
an example:
Conclusion:
In conclusion, Component Design Patterns is a principle used in programming to separate components' responsibilities.
Applying those techniques will help you build scalable and well-organized apps that could be used as a starter for other apps.
So use those techniques and write code only once 😉 .
Thank you for reading! Like for this article as much as you can.
📩 For similar content, feel free to follow me and subscribe to my newsletter.
Share article
- web development
- Equality
- frontend
- Social